Thursday, 12 March 2015

MARQUETRY How it works PART V

Back to the shed, after a couple of days doing normal living things doctors, shopping etc. We had a wonderful day yesterday, having lunch with an old school mate, and his 91 year old mother, a wonderful women who has never had a bad word to say about anybody.


I have decided to go back to the original plan, for the front I have the leaves pointing outward from the centre, this is to allow for a wooden latch. On the marquetry for the back I have turned the leaves inward to allow for the wooden hinges, all going well it should work. 


I have put masking tape on the veneer for the back panel, I then using carbon paper traced the pattern onto the tape.


Using the same process I will complete the marquetry.


When I placed the veneer behind the pattern I didn't judge right, leaving a piece missing from the branch. I could just re-cut the whole piece or just cut a piece for the missing part of the branch, which is what I did.


When the marquetry is complete glue onto the box.

Tomorrow I hope to do the marquetry for the lid. Thanks for visiting the blog and if you have any questions please leave a comment or send me an email.

Tuesday, 10 March 2015

DREMEL MICRO LATHE

This is a special post for all those on Instagram interested in the DIY Dremel Micro Lathe idea. You would think a person who has no real responsibilities, in a wheelchair, a beautiful wife who does almost everything for him, would have time on there hands, not so.


As I didn't make this prototype from any plans, and I am not all that good at CAD, I will try and explain picture by picture how the Lathe is made.


The idea developed one day when I needed a couple of door handles, being as I am to tight to spend the money to buy them, so instead of spending about $4.00 I took a whole day to make a lathe.


I started with the base, the idea being that it was big enough to be stable, can be clamped to a bench or as turnout big enough to sit a paving brick on and that is enough to stabilise the Lathe. 
The dimensions of the base are 5 1/2" x 9 1/2" x 3/4"  or 240mm x 140mm x 19mm.


The arms are quite simple, two struts with a stand at the end. I haven't put the measurement on the diagram, it is set about two inches onto the base, this measurement is not critical as the length of the struts depends on what you want to do with the lathe.


I figure about 18" would be the maximum workable length.

Headstock

Tailstock


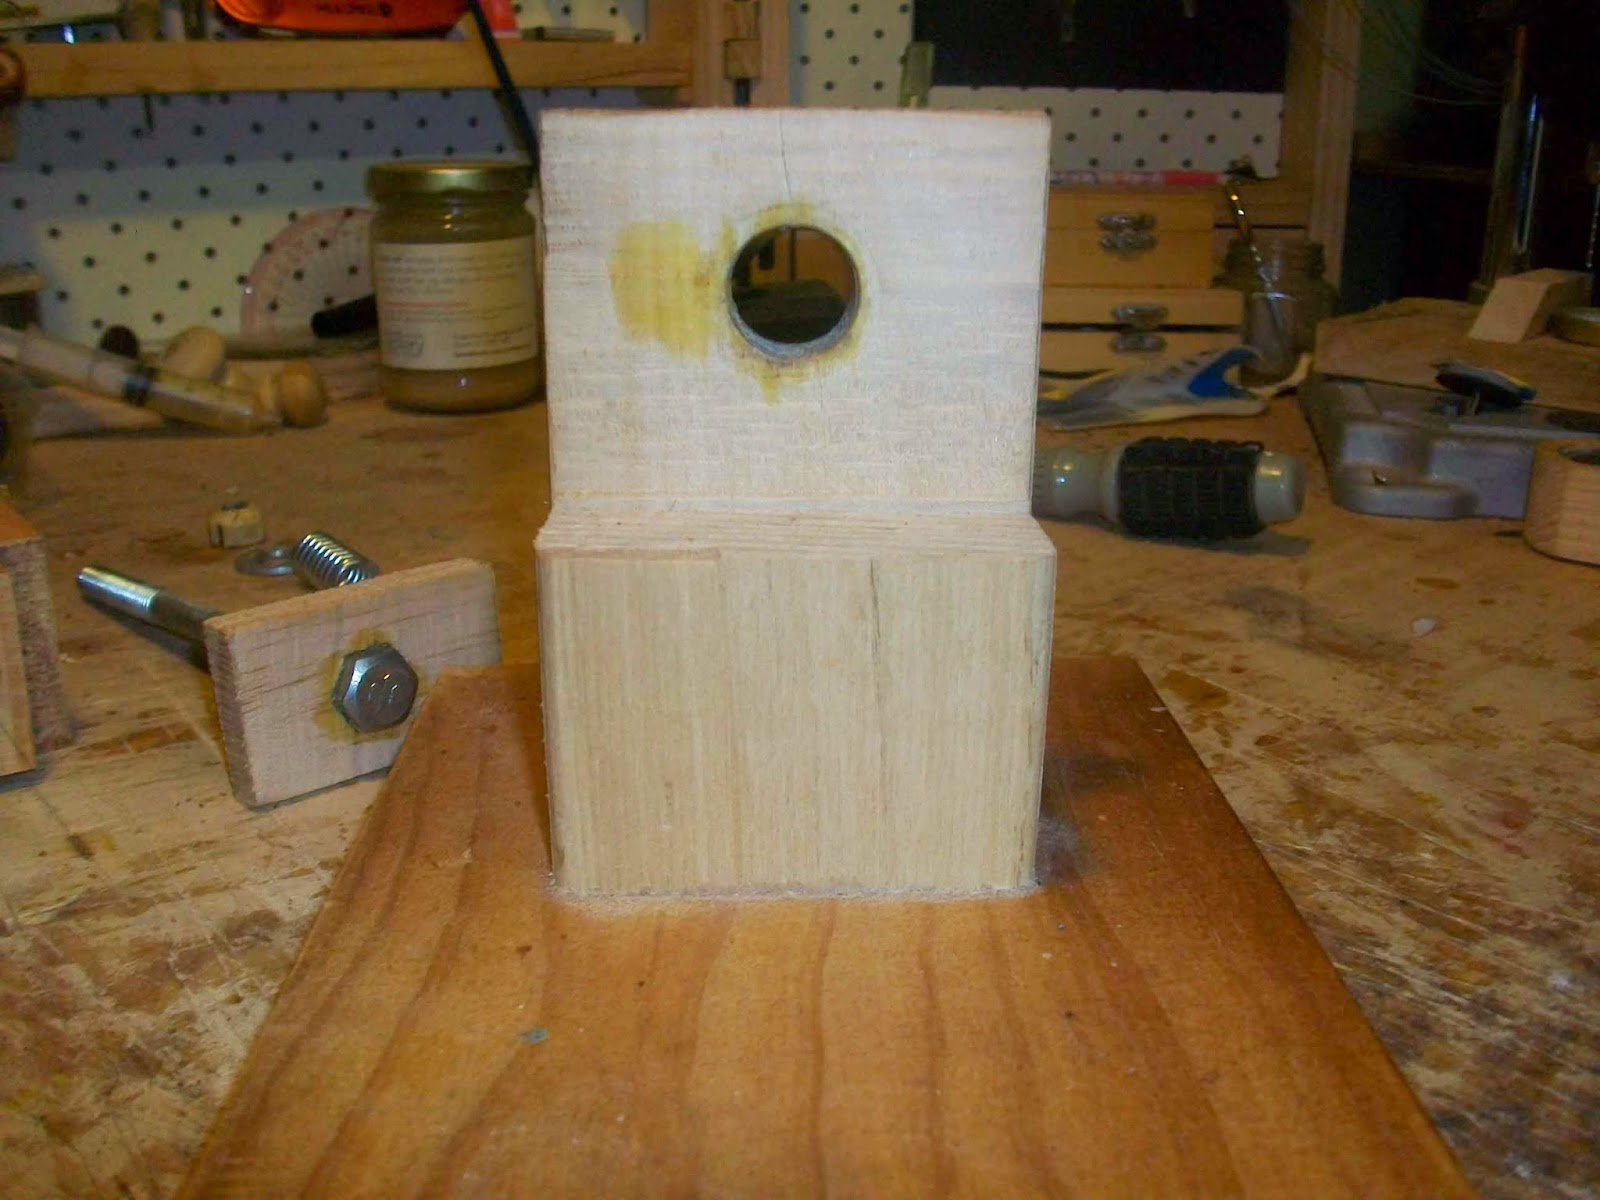
The headstock assembly is a 4 1/4" piece cut off the end of a stud. The hole, I measured the diameter of the Dremel and cut a slightly smaller hole, then I used the dremel to cut the thread, I then coated the hole and thread with super glue and allowed this to penetrate the wood and set.


The tail stock is pretty simple, I centred the hole for the dead centre by putting a drill bit in the Dremel screwed into the headstock and slowly sliding the tail stock onto the drill bit, ensuring the tail stock was completely square.


The clamping mechanism is simply a bolt with spring and washer.


The tool rest is as simple as it looks.


The live centre is a piece of threaded rod with a nut and filed to shape. 


I use a Dremel key less chuck, but the normal collet works just as well. 


The dead centre is a polished and shaped cut off nail. 


For the plate I have glued a nail through a circular piece of MDF, I then glue the blank to this and clean up the face when finished. 


The Dremel rotary tool I use is the 8200 battery tool, Most Dremel tools will work or there are other brands of rotary tool that will also work as well.

I hope that gives enough information for you to construct the micro late, If you have any better ideas I'd love to hear them or if you have any questions please email me holmesp06@gmail.com, good luck.

To download the Sketchup plans click on the link below.

Monday, 9 March 2015

MARQUETRY How it works PART IV

Another day in the shed, working on the current project. Today I've been working on the marquetry for the front of the box.


I have cut the veneer slightly larger then the front of the box, making sure that the bottom edge is completely straight.


Applied masking tape to the veneer.


Tape the pattern to the veneer making sure the bottom is level with the bottom of the veneer.


Trace around the pattern.


I have left the centre of the pattern empty as I want to make and install a rustic wood latch in this area.


For the branch I have selected a piece of Australian Red Cedar


I singed the surface of the veneer with a blow torch, although this looks very dark by the time it is sanded a beep red/brown colour is achieved.


Tape this veneer behind the pattern.


Drill a pilot hole for the scroll saw.


The scroll saw table is set at an angle of about 6 degrees.


In a clockwise direction cut around the branch.


Remove the inlay piece.


Apply glue around the edge of the insert area.


Insert the inlay.


Apply a piece of tape to the front covering the inlay.


Using a small chisel work around the edge of the inlay, pressing down to ensure the surface the flush. Continue the process until the marquetry is complete.


Fore the shading I use a gas soldering iron or hot sand, I prefer the soldering iron as this uses much less gas then trying to keep sand hot.


When the marquetry is finished remove the masking tape.


Apply an even cote of glue to both surfaces.


Position the marquetry veneer on the front of the box.


Clamp into position and allow the glue to dry.

Thanks for visiting, If you have any questions please leave a comment or send me an email.