Tuesday, 13 October 2015

REPAIRING VENEER

Following on from the success the other day, when the veneer crinkled and lifter. 


Sometime ago I made this and used an experimental way of gluing the veneer to the box.


It is very difficult to get a good picture of the problem, but as you can see in the photo the veneer has lifted on the edges, also not visible there are bubble under the veneer where the glue has not stuck properly. Using the same method I used the other day I hope to repair the lid.


By covering the work with non stick paper (I pinched from the kitchen).


And a sheet of printer paper, using a very hot iron (I think this may have been the mistake in the first place, Iron wasn't hot enough) Iron the entire surface of the lid several times pressing down firmly.


Remove the iron and as quickly as possible while the glue is still soft, place a heavy weight on the work and leave until totally cooled.


Remove the weight and check the surface is smooth and adhered properly with no bubbles.


The heat has ruined the finish but this is easily fixed.


Using one of my many scrapers I clean up the surface.


 Make sure the surface is completely flat. 


Thursday, 8 October 2015

FITTING THE HINGES

Summer has arrived early, it is one beautiful day almost to good to go out to the workshop, but hay any day in the workshop is a good day.


I am happy with the recovery job on the lid of the box in the last post.

Today I am fitting the hinges I made the other day.


The first step is to measure the distance from the bottom of the box and mark around the box where the lid is to be cut off, I always measure up from the base as this gives a far more accurate cut. I then cut around the lid to about half the thickness of the sides.


I always measure up from the base as this gives a far more accurate cut. The saw I have used leaves a groove of 1.2mm the thickness of two pieces of veneer.


Next I cover the area the hinges are to be seated with masking tape.


I then mark the edges for the hinge to sit. Mark equal distance from each end.


Position the hinges.


Apply tape to the back of the hinge.


Apply super glue to the taped area.


I then position the hinge on the box using a couple of scalpel/xacto knifes to insure the hinge is centered correctly.


Then use a square to make sure the hinge is seated properly and allow the super glue to set.


After the glue is properly set, using a scalpel/xacto knife cut around the hinge.


Remove the hinge.


Leaving a clearly defined section to be removed.


There are a number of methods to remove the waste, I use a small chisel to start.


After enough material has been removed with the chisel,


test the hinge for fit.

Next I use a Dremel with a Stewart Mac router base to clean out the rest of the wast, Set the depth to slightly past the pin in the hinge.


You may need to do this in several steps.


Clean both hinge recesses at the same time to ensure they are exactly the same depth. 


Then using the same saw finish cutting through the box.


As I work around the box I put wast veneer into the saw cut to hold the box and lid apart.


With the lid having been cut from the box, I then laminate the edges before finishing the hinges.


Put the top back on the box and ensure all the corners are aligned and straight.


Press the hinges into position to ensure proper fit and make any necessary adjustments.


Apply glue to both the top of the hings and the lid of the box, I like to allow the glue to sink into the wood and go tacky before pressing into position.


Clear up any excess glue and allow to dry.


After the glue has dried on the top of the hinges I then repeat the process for the bottom of the hinges.


Clean off all excess glue and allow to dry, ensuring the lid isn't glued to the box.

Thanks for visiting and if you have any comments or questions I'd love to hear from you.

Sunday, 4 October 2015

"OPPS": Fixing a problem

Somewhere on the wonderful world of GOOGLE I once read that:
"Anyone can do woodwork, but a craftsman is someone who has taken the time to learn how to cover there mistakes." don't know who by but full credit to them.
When you think about it this is very true, I have done a lot of woodwork and seen a lot of woodwork done over the years and in all this time I can't remember any project I've done or seen done without making a mistake, my wife in the quilting world said that only god is perfect so all quilts are made with a mistake still evident.  That's my philosophy for today which leads me to today's post.


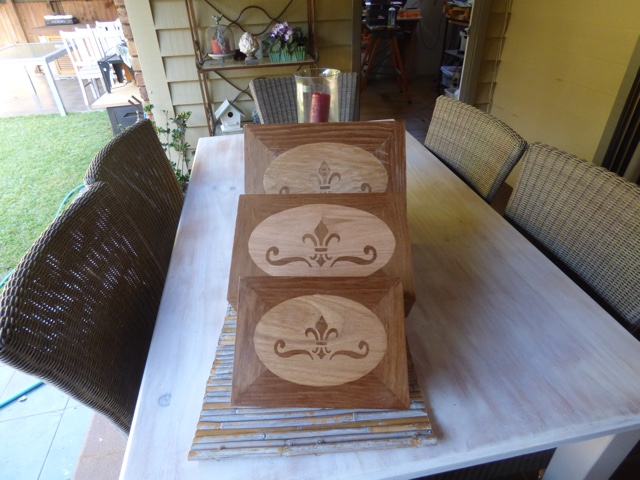
In my last post I explained how I make wood hinges, I am currently working on a nest of three boxes all the same but varying sizes. With the marquetry for the top of the largest box I have struck a major problem, I glued the panel to the top of the box pressed
and clamped it into position and left it to dry in the same manner as i usually do. But when I opened it the veneer immediately started to lift and crinkle as a sheet of paper does when to much glue is used. I have know idea why, it maybe that this is the largest area that I have covered at one time, maybe the larger area required longer for the glue to set, maybe it is because the humidity was to high. I will do some experimentation to find out but for the time being what am I going to do.


Knowing from past experience that if you cote both surfaces with PVA glue and allowing to dry, then by the use of a hot iron Iron the two parts together. So I decided to cover the surface with nonstick cooking paper and a sheet of printer paper then with a very hot I slowly ironed and smoothed the surface In the hope that the heat would first course the veneer to shrink, also dry any excess moisture and thirdly the heat would reactivate the glue. 


This all worked really well except it left the surface quite rough and uneven, so with a number of home made scrapers set for a progressively finer finish.


I was able to cut the surface back until smooth.


I an quite happy with the result, if anyone out in eland has any other ideas or suggestions or has any idea of why this has happened I'd love to hear from you.
Thanks to all for taking the time and showing an interest in my work.